I. survival gear
|
-The Necessities-
Section 1:1 -Weaving and Sewing Basics -Clothing -The Sleeping System -The Bushcraft Knife Section 1:2 -Tools for Making Fire -Making and Establishing a Fire -Primitive Fire Tech -The Forge |
Section 1:3 -Bushcraft Tools
-Axe & Hatchet -Saws Section 1:4 -The Rucksack -The Survival Kit -Minimal Gear Set Up Section 1:5 -Camp Site Essential Set Up -The Tent |
Section 1 -Clothing & GEar
|
VIDEO COMING SOON!
Section 1:1 - CLOTHING (Grand Syllabus Ref#3 pg. 5-6) Topics Discussed: 1.1 General uses and understanding clothing design features for the use of summer/winter conditions 1.2 Differences men and women react to cold and heat and their in needs 1.3 Clothing hygiene and cleanliness, insulation and the use of environmental layers 1.4 Extreme cold weather needs and the use of Five insulation layers max layer thicknesses weave types used between any of the layers 1.5 Garment hoods and their effectiveness and convenience and the scarf or neck tube 1.6 The effectiveness of using wool for heat and the use of other clothing combined to perform in a similar fashion 1.7 Wet weather clothing -Wool -Poncho -Jacket |
1.8 Gloves
1.9 Head wear 1.10 Footwear -Wool socks -Wet weather shoes -Cold weather shoes -Jungle boot -Leather boot 1.11 Ear wear 1.12 Clothing repair and repair kits |
SKILL SETS - GEAR AND CLOTHING
|
Basic
-Selecting and preparing and the ability to demonstrate what items to pack based upon the needs for the location, terrain and weather for a overnight and or day trip. -The ability to pack and share with a group and carry the essential gear needed for a overnight and or day trip. -Make a list of the individual gear you are packing for a trip. -Prepare and make a itemized list of the gear one is taking with the weight and cost each items is valued at. |
Intermediate
-Select the appropriate pack needed for a week long trip and carrying the gear needed. -Recreate, fix or make an item in which a piece of gear is collectively used by your camping group. -Select the appropriate pack needed for any type of trip one will be taking. -Able to pack any gear of any form and know how it should be packed based upon the needs of transport. -Choosing and or selecting the appropriate footwear needed for any type of trip. |
Advanced
-Know how to select gear for oneself and others in the group for any style of travel. -Able to make an pack using materials in the woods for the use of carrying and or travel. -Able to make and specify in a list gear needed for going on any expedition -Able to make and specify in a group list gear needed for going on any expedition -Able to maintain and create field repairs to any gear used and or taken at any time. |
Mastery
-Know how to dress for long term outdoor living. -Know how to repair and maintain ones clothing, gear and footwear during long periods in all weather conditions. -Able to create a item of clothing that can be used for all four seasons -Able to make and or replace any item taken into the field using natural materials. |
Understanding FaBric and its internal make up:
ripstop -
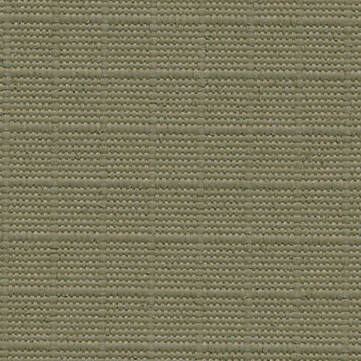
What makes ripstop one of the most notorious fabrics is do to its weave pattern. For most, this is merely over looked and just sought after do to its popularity and known durability, but what makes this fabric so worth seeking? The weave is simple a plain weave for all you non-weavers out there. What this means is that the warp threads are merely over lapped in intervals of one section of thread is on top of a weft section of thread with opposites taking place per-section thus making a under over pattern. What makes ripstop work is when there is both on the warp and and on the weft a section per so many millimeters of measurement of thread a thicker thread which is used thus helping the strength of the plain weave become less prone to tearing, as the thicker threads require more force and stress in order to tear through it. Therefore, do to its added strength, this pattern slows down the tear process thus being labeled ripstop. Although this does not in any way promise that the fabric will by no means rip at all, its main design is merely meant to detour the rip from increasing in length and or slowing down the force do to the reinforced threads.
THE SLEEP SYSTEM
|
VIDEO COMING SOON!
Section 1:2 -THE SLEEP SYSTEM (Grand Syllabus Ref#10 pg. 15-16) Topics Discussed 1.1 Understanding the definition of adequate sleep The minimum amount needed 1.2 Why one needs a restful sleep 1.3 Why do I need to have sleeping gear in my survival kit 1.4 How to choose a appropriate sleeping bag 1.5 How sleeping bags, mats, beds, fire and clothes are inter connected 1.6 The Mat 1.7 The Leaf Bed 1.8 Bough Bed 1.9 Understanding how convection effects the need for an open cell and closed cell mattresses 1.10 The different types of Beds made of natural materials 1.11 Understanding how to function without a sleeping bag 1.12 How to make a mat from a loom 1.13 The multiple purposes of a bed/stretcher 1.14 Waterproofing ones bag 1.15 Bag mainte |
SKILL SETS CAMPCRAFT - GEAR AND CLOTHING
|
Basic
-Selecting and preparing and the ability to demonstrate what items to pack based upon the needs for the location, terrain and weather for a overnight and or day trip. -The ability to pack and share with a group and carry the essential gear needed for a overnight and or day trip. -Make a list of the individual gear you are packing for a trip. -Prepare and make a itemized list of the gear one is taking with the weight and cost each items is valued at. |
Intermediate
-Select the appropriate pack needed for a week long trip and carrying the gear needed. -Recreate, fix or make an item in which a piece of gear is collectively used by your camping group. -Select the appropriate pack needed for any type of trip one will be taking. -Able to pack any gear of any form and know how it should be packed based upon the needs of transport. -Choosing and or selecting the appropriate footwear needed for any type of trip. |
Advanced
-Know how to select gear for oneself and others in the group for any style of travel. -Able to make an pack using materials in the woods for the use of carrying and or travel. -Able to make and specify in a list gear needed for going on any expedition -Able to make and specify in a group list gear needed for going on any expedition -Able to maintain and create field repairs to any gear used and or taken at any time. |
Mastery
-Know how to dress for long term outdoor living. -Know how to repair and maintain ones clothing, gear and footwear during long periods in all weather conditions. -Able to create a item of clothing that can be used for all four seasons -Able to make and or replace any item taken into the field using natural materials. |
THE BUSHCRAFT KNIFE
|
VIDEO COMING SOON!
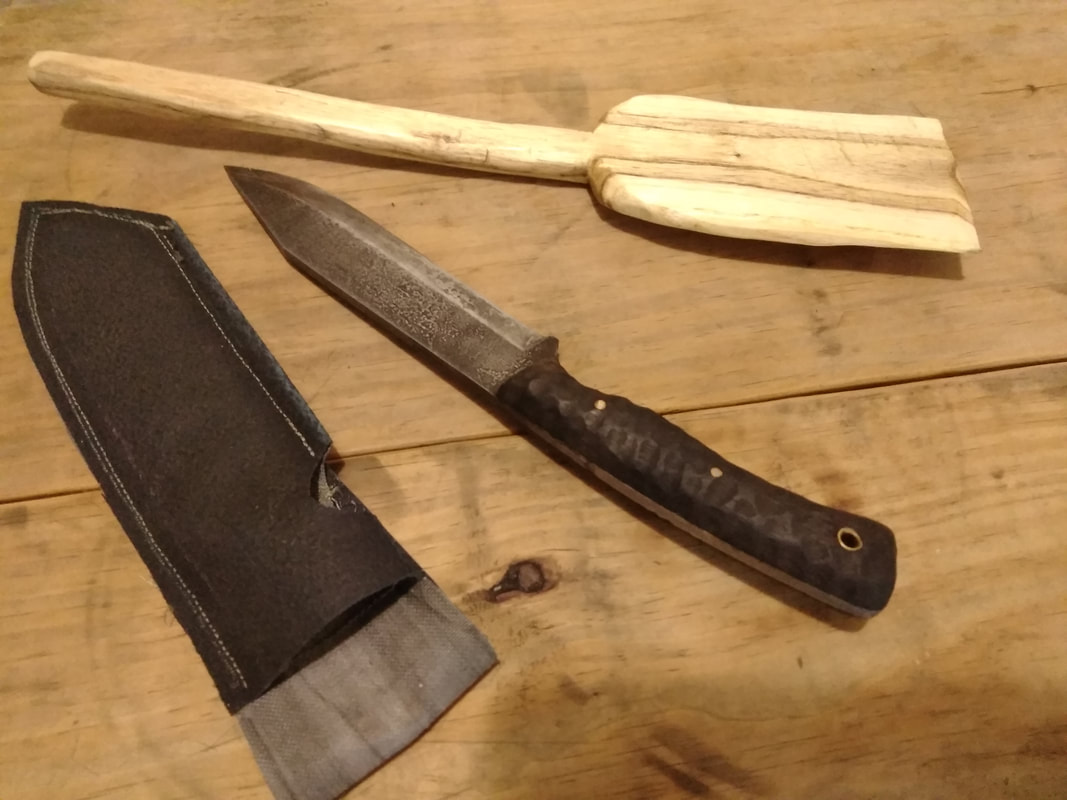
Section 1:3 - THE BUSHCRAFT KNIFE (Grand Syllabus Ref#5 pg. 10) Topics Discussed: 1.1 The “survival” knife - Choosing a knife 1.2 Knife safety 1.3 Knife skills -The try stick -The netting needle and gauge -Eating/stirring spatulas -Four curls or more in the making of feather sticks -Making replacement sheaths for knives 1.4 Cuttings poles 1.5 Cutting trees 1.6 Knife sharpening 1.7 Knife protection 1.8 Skills when there is no knife to cut with |
|
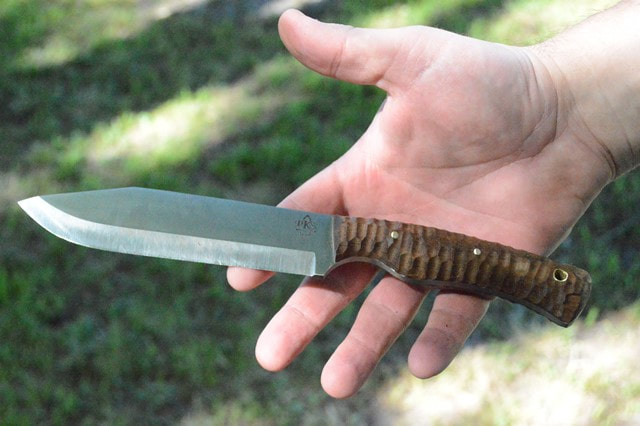
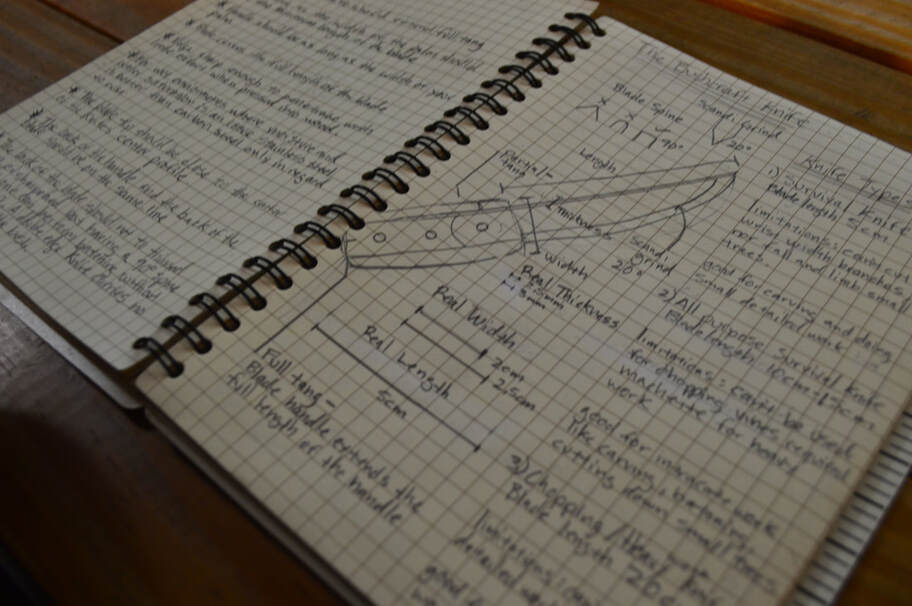
Choosing A Knife
Mors Kochanski defined a good survival knife as being any knife whose metal blade body and handle extend its entire length (also known as being a full tang knife). Being made out of a high quality carbon steel which is best if made from any 1080 or higher grade carbon steel do to the fact that these kinds of steels are soft enough maintain and hold a edge for long periods of time, yet very strong in themselves. The handle as he quotes should be as long as the width of ones hand to grasp around and whose handle is not round but oval, in order to fit and conform to ones hands snugly. While the blade is best for all around uses if it be 10-15 cm or 4'-5' 3/8 inches in length, as it can cut down small saplings, and be used in batoning wood, as well as fulfill most carving needs. Any blade smaller will begin to greatly decrease the knifes abilities. As for the blades overall thickness, one should be about 2.5 to 3 mm or 1/8 -1/4 inch thick and have a 90 degree spine edge; able to be used to scrap off pieces of a ferro rod or when struck with a flint rock create sparks, or be used to make small wood shavings for fire starting.

|

|
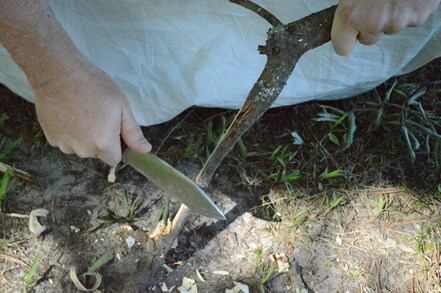
When it comes to sincerely looking for a good knife one thing is for sure, what one likes, another ones despises. But when it comes to the characteristics of a knife now we are completely talking about a whole new thing in itself. And that is because the characteristics can not be contended because these things are the backbone of what we are looking for in a good bushcraft knife. Different blade types arouse areas of contention of which I have found between knifes of different blade types. If you have a knife that has a convex profile the friction of the knife makes cutting easier when splicing wood. However the roundness makes more of a broader cut when it comes to its use in regard to cutting food. As for the scandi profile knives because its shape resembles much like an axes profile in part its cutting will indeed divide forcing good splitting abilities, but you have to use less pressure and more strokes if you are wanting to keep the broader cut from happening as it will do if used on food. Which makes the v edge profile or the concave blade edges to work better with simple straight cuts which do not create a broad cut. However, when making feather sticks the scandi profiles works much better as its shape helps the cutting process to naturally dig into the wood while the vertical slant helps lift the wood shaving up and away. And of all the profiles is the easiest to sharpen is the scandi profiles as the blade lays on a sharpening wet stone with ease and does not require much play at all when holding while making the strokes to sharpen it.
-KNIFE SAFETY
|
-The Try Stick
Try Stick Notches
|
1. The Round Notch
2. The Pot Hook 3. The Saddle Notch 4. Square Notch 5. The Mitred Lapped Notch 6. The Jogged and Wedge Splice 7. The Dovetail Pin and Socket 8. The Dovetail Notch 9. The "V" Notch |
10. Spear Notch
11. The Knife tip Mortice 12. Diameter Reduction 13. The Knife Edge 14. The Split 15. The Bow Notch 16. The Latch Notch 18. Bark Stripping 17. The Whistle Project |
-The COOKING spatula
|
Get a branch or bough of any fresh green wood, not dead wood, that is about 5 inches in width and cut a section that is about 15 inches in length. Once you have cut that out you can begin splitting the wood into segments that are about 1 to 1 and a half inches thick. Make sure the segment does not have any splits along the grain of the whole piece. Using an hatchet or ax begin cutting down and thinning lower 5 inches to create the spatula paddle. Keep cutting through the wood till you have a nice tapering that goes from about half inch down to 1/8 of an inch on the five inch section which will be used for the paddle. Using a saw make two cuts about 5 inches from the bottom on both sides about 1 inch deep. And then use your bushcraft knife to baton the segments so that both sides cut and break off at the sawed sections you made 5 inches from the bottom. This will begin to create your spatula handle. Then use your knife to cut and trim off all the areas so as to make it nice and smooth cutting down the corners and making the edges rounded off. To see more check out our woodworking video tutorials where you can learn more!
|
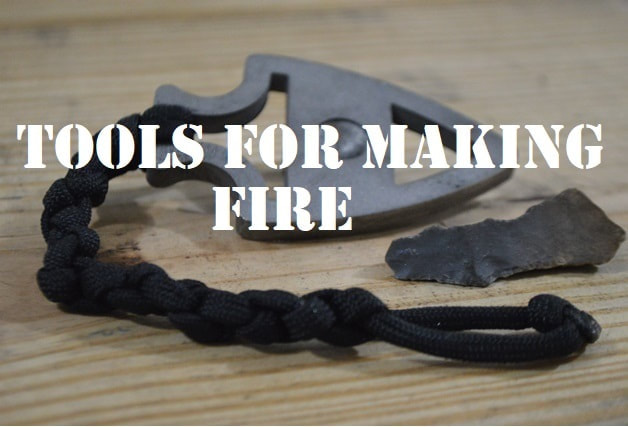
Section 2 -TOOLS FOR MAKING FIRE
-Natural Materials-
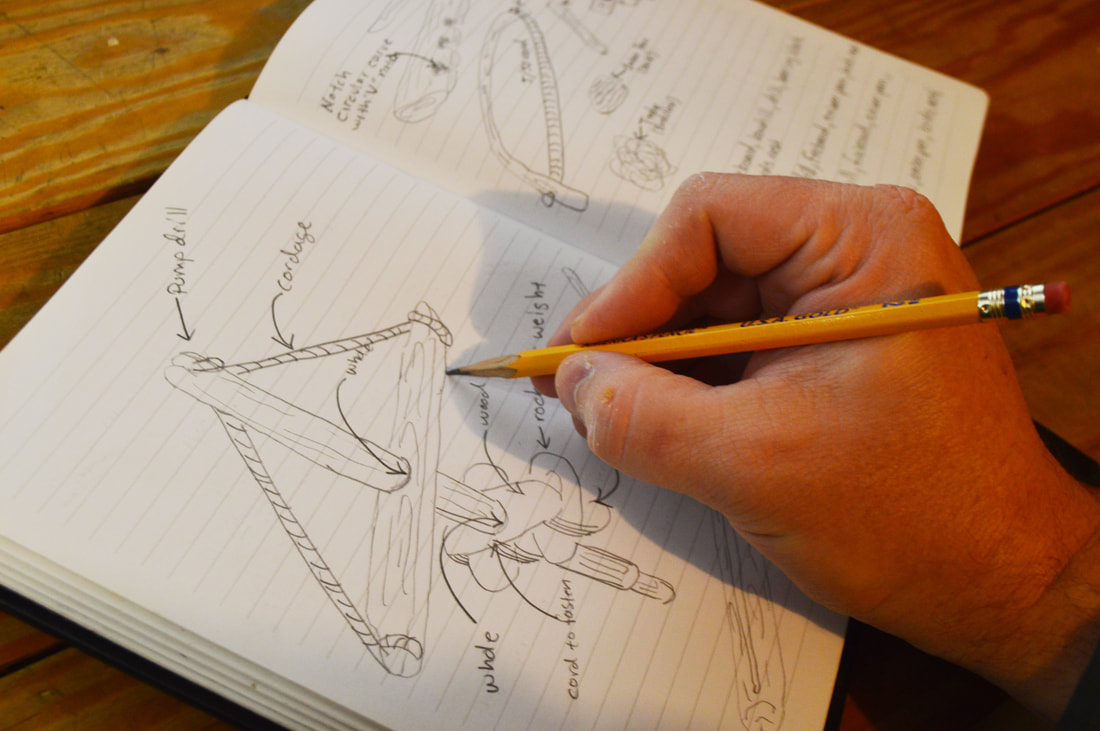
1.2 Friction Fires Methods 1.3 Bow-drill 1.4 Pump-drill 1.5 Hand-drill 1.6 Fire-plow 1.7 Bamboo Fire Saw |
VIDEO COMING SOON!
Section 2:1 - TOOLS FOR MAKING FIRE (Grand Syllabus Ref#4 pg. 7-10) Topics Discussed: -Man Made- 1.1 Flint and Steel w/ Char Cloth (protect from moisture) -Lighter (protect from evaporation) -Ferro Rod (protect from fire) -Ferro Rod w/ Char Cloth (protect from fire/moisture) -Ferro Rod W/ Magnesium Bar (protect from fire/rust) -Paper/Wood/Waterproof Matches (protect from moisture) -Magnifying Lens (sun/daytime only,protect from breaking) (When There Is No Other Fire Making Tools Available The Ability To Make A Fire Through The Means of Friction Makes These Essential To Survival) |
-Making and Establishing A Fire

|
Section 2:2 - MAKING AND ESTABLISHING A FIRE
2.1 How to Kindle a Fire -Different Types of Kindling Methods -Friction -Flint and Steel -Ferro Rod -Matches 2.2 Order of Operation -Kindling -Establishing -Maintaining 2.3 Rain Proof Fire 2.4 Types of Fire Lays -Log Cabin -Teepee -Pyramid -Bush Bundle 2.5 Kindling Errors and Mistakes -Wood To Damp = Smoke -Wood To Green = Smoke -Wood To Punky = Smolders -Not Enough Air Flow = Fire Dies Off -Not Enough Kindling = Fire Dies Off -Not Fuel = Fire Dies Off 2.6 The Square Cube Law |
SKILL SETS FIRECRAFT
|
Basic
-Selecting and preparing a fire site for the use of cooking, light, and heat. -Choose and learn how to operate and care for a wood-fire camp stove. -Learn how to ignite and use as well as extinguish different fuels sources. -Selecting and storing various materials for the use for making a fire. -Discuss and observe how to perform conservation practices and use safety skills sets. -Able to both demonstrate and light a fire with a single paper match as well as a wooden match. -Understand the show ones proficiency of the laws of fire. |
Intermediate
-Able to build a stove fire or open fire and cook on it. -Ignite and use and care for various stove types and able to cook on all of them. -Able to make different cooking utensils and apparatuses for an open cooking fire. -Reclaim a single use fire pit in order to leave a minimal trace. -Know how to identify sources of fat wood, resins and other ignitable fire aids -Know the common woods that are around and available in your area and their burning qualities. -Ignite a fire through the use of a friction fire starting method and percussion fire starting method |
Advanced
-Able to build various fire lays, know their uses and able to discuss them as well -Able to build a fire in wet inclement weather -Able to build a fire in the snow -Able to build a fire in windy conditions -Able to build a fire in safe manner with hazardous conditions. -Able to discuss the factors and issues that surround stove design and how to choose and or select one and how to proficiently use one in a closed tent. |
Mastery
-Able to build a fire for any situational use for all camp needs -Able to create a friction fire set in the woods and without the use of anything but the friction based fire method under a variety of weather conditions. -Able to discuss the issues that surround places of ecological concern in regards to fire use. -Reclaim fire pits and leave no trace method for any site that has been duplicated. -Able to discuss the issues concerning and surrounding wood and fossil fuels based fires. And prove why you support and why others should support the fuel choices as well. And lay down your own personal ethics you live by. |
HOW to make Fire when all you have AvailaBle is wood:
Friction FireS:
Friction fires are by all means the only way to make fire when nothing else you have on hand is able to produce a flame. Perhaps your matches are sopping wet, your lighter no longer has fuel but only its sparking ability, or your ferro rod fell into the fire without you realizing, and it was only after the fire had once died out from a previous fire lay the inevitable understanding of its destruction is realized, or maybe the sky is covered with clouds and there is no sun to shine upon your mag lens to create a fire. All these possible scenarios and or the possible thousands of others could indeed fit this occasion. However it may be, no matter how you spin the circumstance if the only thing you is wood there is an ability to make fire.
Friction fire was known as the aboriginal fire making method by those whom whom later settled in America, do to the fact that the most widely known fire making method used by early settlers was procured by means of flint and steel. Out of the four methods used two were the easiest ones to make with the least amount of material. The hand-drill and the fire-plow methods are the only
Friction fire was known as the aboriginal fire making method by those whom whom later settled in America, do to the fact that the most widely known fire making method used by early settlers was procured by means of flint and steel. Out of the four methods used two were the easiest ones to make with the least amount of material. The hand-drill and the fire-plow methods are the only
|
two methods in which all ones needs is a long straight stick and a base board to either use for exerting a downward rotating friction force, or for the use of exerting a back and forth rubbing motion in a grove to create friction. The hand-drill stick has to be about 18" inches long with a rounded off end to use for rotating in the grove made in the fire board. The fire board with a notch cut into the wood to
|
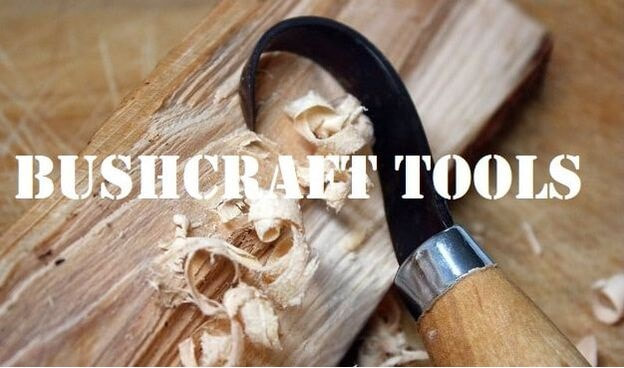
Section 3 - BUSHCRAFT TOOLS
|
VIDEO COMING SOON!
Section 3:1 - BUSHCRAFT TOOLS (Grand Syllabus Ref#15 pg. 21) Topics Discussed: 1.1 Tools for long term wilderness living 1.2 The E-tool (shovel) 1.3 Auger bits 1.4 The spoke shave 1.5 Wood carving items -Spoon gouges -The crooked knife 1.6 Wood chisels 1.7 Metal cutting chisel 1.8 Hacksaw blades 1.9 Gimlet bits 1.10 Awls of all sorts |
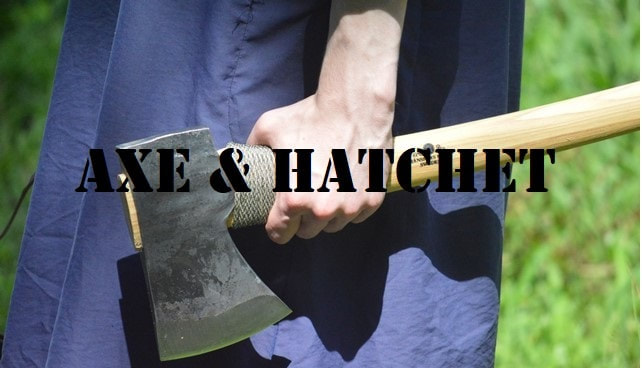
AXE & HATCHET
|
VIDEO COMING SOON!
Section 3:2 - AXE & HATCHET (Grand Syllabus Ref#13 pg. 19-20) Topics Discussed: 1.1 The bigger the safer and more effective 1.2 Choosing a survival axe 1.3 General features of a good axe 1.4 The felling axe 1.5 The medium axe 1.6 The carpenter’s axe 1.7 Axe safety training 1.8 Field replacement handles 1.8 Axe sheaths 1.9 Splitting firewood methodology 1.10 Splitting with wedges 1.11 Axe sharpening 1.12 The hatchet |
|
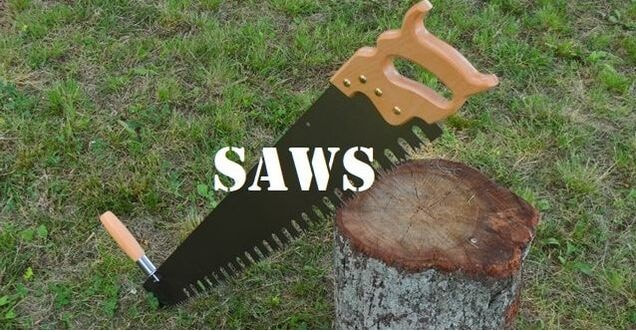
SAWS
|
VIDEO COMING SOON!
Section 3:3 - SAWS (Grand Syllabus Ref#14 pg. 20-21) Topics Discussed: 1.1 Survival saw -wood -snow 1.2 A saw belt 1.3 Saw safety 1.6 Sharpening and setting saw teeth 1.7 Saw construction 1.8 The folding saw 1.9 Folding buck saw 1.11 Wire saws |
Section 4 - The SUrvival Kit
|
VIDEO COMING SOON!
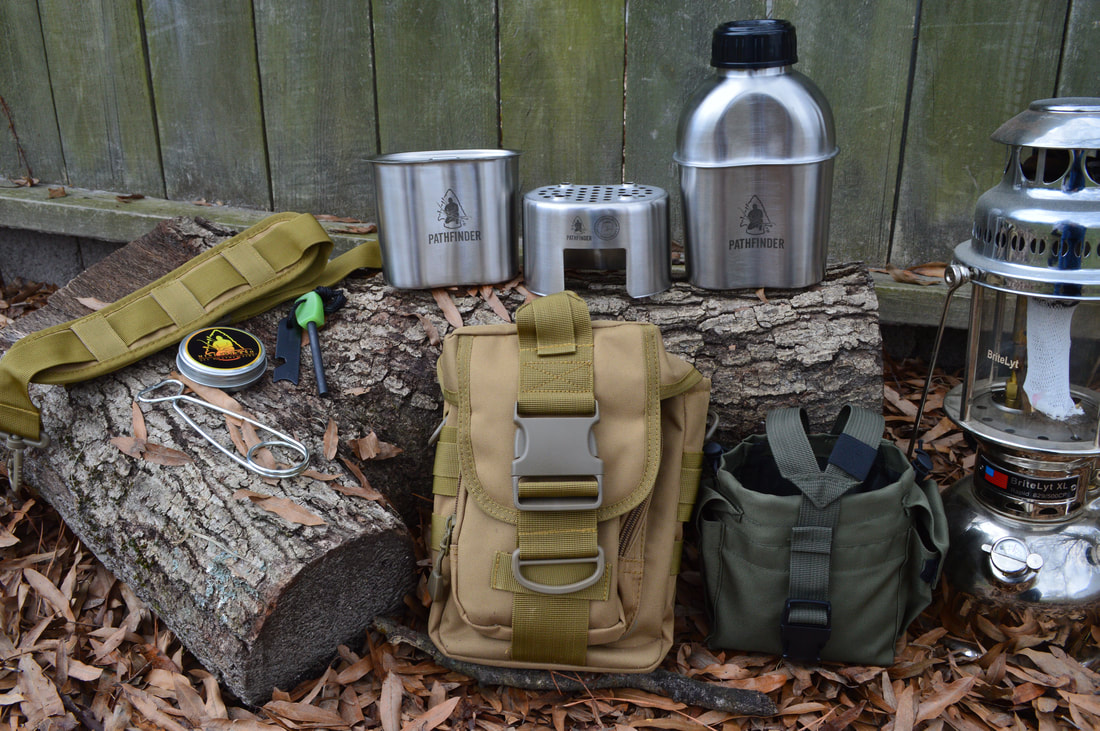
Section 4:1 -The Survival Kit (Grand Syllabus Ref#15 pg. 21) Topics Discussed: 1.1 Tools for long term wilderness living 1.2 The E-tool (shovel) 1.3 Auger bits 1.4 The spoke shave 1.5 Wood carving items -Spoon gouges -The crooked knife 1.6 Wood chisels 1.7 Metal cutting chisel 1.8 Hacksaw blades 1.9 Gimlet bits 1.10 Awls of all sorts |

|
|
VIDEO COMING SOON!
Section 4:2 -Minimal Gear Set Up (Grand Syllabus Ref#15 pg. 21) Topics Discussed: 1.1 Tools for long term wilderness living 1.2 The E-tool (shovel) 1.3 Auger bits 1.4 The spoke shave 1.5 Wood carving items -Spoon gouges -The crooked knife 1.6 Wood chisels 1.7 Metal cutting chisel 1.8 Hacksaw blades 1.9 Gimlet bits 1.10 Awls of all sorts |
Section 5 - Camp Site
Essential Set up
|
VIDEO COMING SOON!
Section 5:1 -Camp Site Essential Set Up (Grand Syllabus Ref#15 pg. 21) Topics Discussed: 1.1 The Tent -The Camp Stove -Bedding 1.2 The Camp Kitchen -The Kitchen Tarp -The Stove (Wood or Propane) -Kitchen Supplies -The Eating Area -Lighting -Fuel Needs (Wood, Gas, & Propane) -Washing Station -Waist Disposal 1.3 The Latrine -Why Separate Urine From Feces -What To Cover Feces With 1.4 The Shower 1.5 The Clothes Washing Station -Water Needs -Washing Supplies 1.5 The Tent -The Camp Stove -Bedding 1.6 Camp Tools -For Clean Up -Maintenance -Weather Needs |

|
SKILL SETS COOKCRAFT
|
Basic
-Able to plan and prepare balanced meals that require no cooking. -Able to prepare a well balanced meal and able to demonstrate three types of of the fire cooking methods. -Able to share and set up a camp kitchen for one or more nights. -Share in planning a food list for a two day trip as well as a cooking menu which includes dehydrated and other types of packed foods. And able to know the amount of water needed and the sources of water that can possible be used. |
Intermediate
-Able to build a stove fire or open fire and cook on it. -Ignite and use and care for various stove types and able to cook on all of them. -Able to make different cooking utensils and apparatuses for an open cooking fire. -Reclaim a single use fire pit in order to leave a minimal trace. -Know how to identify sources of fat wood, resins and other ignitable fire aids -Know the common woods that are around and available in your area and their burning qualities. -Ignite a fire through the use of a friction fire starting method and percussion fire starting method |
Advanced
-Able to build various fire lays, know their uses and able to discuss them as well -Able to build a fire in wet inclement weather -Able to build a fire in the snow -Able to build a fire in windy conditions -Able to build a fire in safe manner with hazardous conditions. -Able to discuss the factors and issues that surround stove design and how to choose and or select one and how to proficiently use one in a closed tent. |
Mastery
-Able to build a fire for any situational use for all camp needs -Able to create a friction fire set in the woods and without the use of anything but the friction based fire method under a variety of weather conditions. -Able to discuss the issues that surround places of ecological concern in regards to fire use. -Reclaim fire pits and leave no trace method for any site that has been duplicated. -Able to discuss the issues concerning and surrounding wood and fossil fuels based fires. And prove why you support and why others should support the fuel choices as well. And lay down your own personal ethics you live by. |
|
VIDEO COMING SOON!
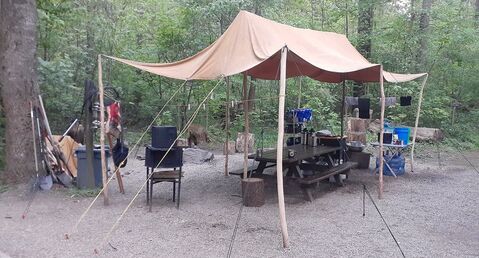
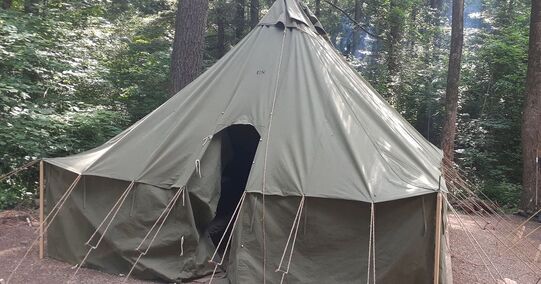
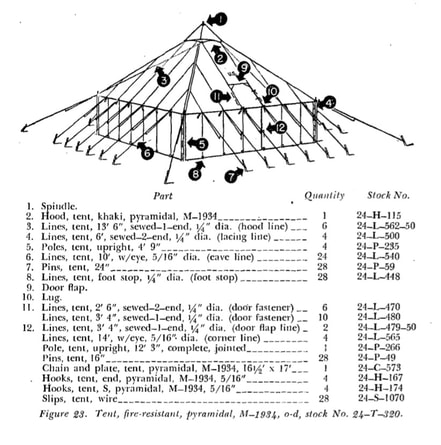
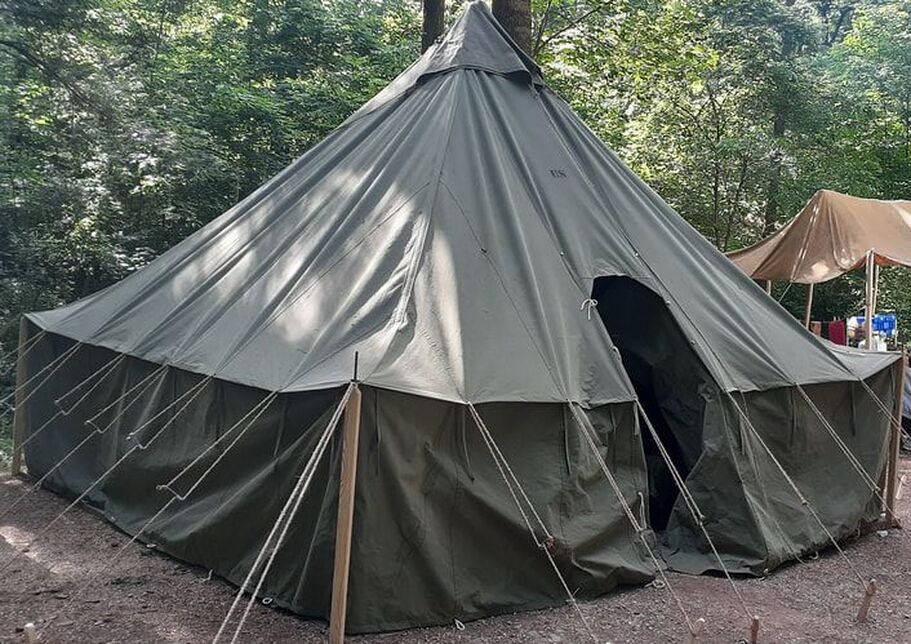
Section 5:2 -The Tent (Grand Syllabus Ref#15 pg. 21) Topics Discussed: 1.1 The Tent Material -Canvus -Synthetic -Truck Mounted Tents vs Ground Staked Tents 1.2 The Tent Stove -Not All Sizes Fit All Needs 1.3 The Bedding 1.4 Tent Lighting 1.5 Tent Stakes -Wood -Metal 1.6 Tent Tools -The Mallet -Types of Ropes 1.7 Essential Rope Knots/Ties 1.8 Water Proofing Substances 1.9 Tent Care |
SKILL SETS CAMPCRAFT
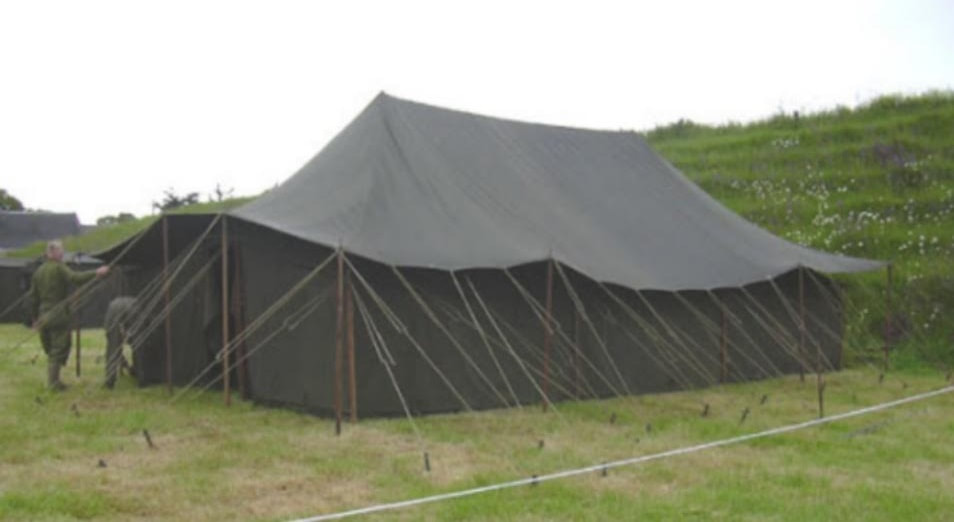
Large Size Family/Group Tents
8 Man Tent
|
This tent is 16 ft wide, 16 ft long and 11 ft high with a floor space of 256 square ft.
Materials: Made of 12.29 ounce duck canvas and the sod cloth is made of 9.85 ounce duck canvas Pitching: The line of the tents are marked by driving a wall pin on the spot to be occupied by the right front corner of each tent. The interval between adjacent marking pins should be 30 ft. This leaves a space about 2 ft between tents if placing multiple tents side by side. It takes four men approximately 30 min to erect this tent. |
16 Man Tent

|